使用ispconfig3,我们可以管理和安装多个PHP版本以映射这些单独的站点。在这里,我向您展示了*简单的方法。
以下所有命令均使用 root 权限!
*步:更新系统
apt-get update
apt-get upgrade第二步:将Sury.org添加到source.list
apt-get install apt-transport-https lsb-release ca-certificates
add-apt-repository ppa:ondrej/php
apt-get update
apt-get upgrade第三步:安装PHP版本
PHP 5.6:
apt-get -y install php5.6 php5.6-common php5.6-fpm php5.6-gd php5.6-mysql php5.6-imap php5.6-cli php5.6-cgi php-pear php5.6-mcrypt php5.6-curl php5.6-intl php5.6-pspell php5.6-recode php5.6-sqlite3 php5.6-tidy php5.6-xmlrpc php5.6-xsl php-memcache php-imagick php-gettext php5.6-zip php5.6-mbstring php5.6-soap php5.6-common php5.6-opcache php5.6-mysqlPHP 7.0
apt-get -y install php7.0 php7.0-common php7.0-fpm php7.0-gd php7.0-mysql php7.0-imap php7.0-cli php7.0-cgi php-pear php7.0-mcrypt php7.0-curl php7.0-intl php7.0-pspell php7.0-recode php7.0-sqlite3 php7.0-tidy php7.0-xmlrpc php7.0-xsl php-memcache php-imagick php-gettext php7.0-zip php7.0-mbstring php7.0-soap php7.0-common php7.0-opcache php7.0-mysqlPHP 7.1
apt-get -y install php7.1 php7.1-common php7.1-fpm php7.1-gd php7.1-mysql php7.1-imap php7.1-cli php7.1-cgi php-pear php7.1-mcrypt php7.1-curl php7.1-intl php7.1-pspell php7.1-recode php7.1-sqlite3 php7.1-tidy php7.1-xmlrpc php7.1-xsl php-memcache php-imagick php-gettext php7.1-zip php7.1-mbstring php7.1-soap php7.1-common php7.1-opcache php7.1-mysqlPHP 7.2
apt-get -y install php7.2 php7.2-common php7.2-fpm php7.2-gd php7.2-mysql php7.2-imap php7.2-cli php7.2-cgi php-pear php7.2-curl php7.2-intl php7.2-pspell php7.2-recode php7.2-sqlite3 php7.2-tidy php7.2-xmlrpc php7.2-xsl php-memcache php-imagick php-gettext php7.2-zip php7.2-mbstring php7.2-soap php7.2-common php7.2-opcache php7.2-mysqlPHP 7.3
apt-get -y install php7.3 php7.3-common php7.3-fpm php7.3-gd php7.3-mysql php7.3-imap php7.3-cli php7.3-cgi php-pear php7.3-curl php7.3-intl php7.3-pspell php7.3-recode php7.3-sqlite3 php7.3-tidy php7.3-xmlrpc php7.3-xsl php-memcache php-imagick php-gettext php7.3-zip php7.3-mbstring php7.3-soap php7.3-common php7.3-opcache php7.3-mysql第四步:在Ubuntu中将PHP重置为默认值(必须)
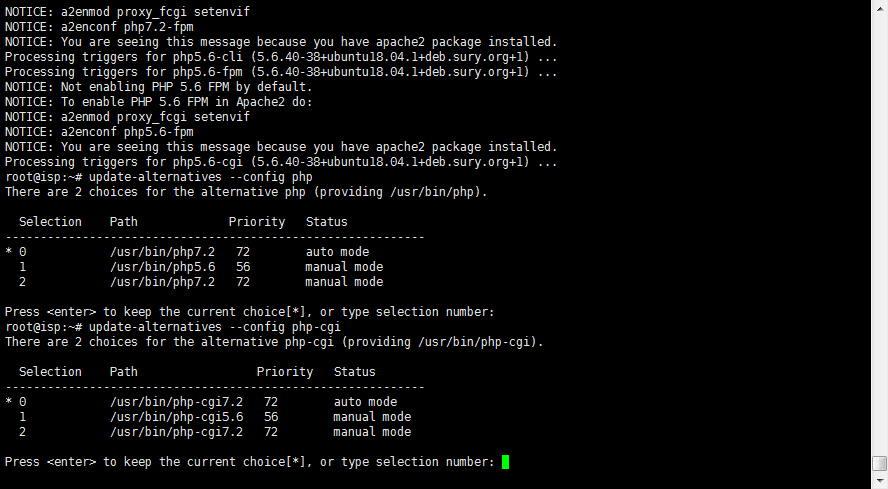
通过安装新的PHP软件包,Ubuntu中的默认PHP版本已更改为*新的PHP版本。这可能会导致某些应用程序出现问题,因此我们将其重置为默认值。
对于Ubuntu 18.04,我们选择:PHP 7.2
同时执行两个命令,并将两者都设置为DEFAULT:
update-alternatives --config php
update-alternatives --config php-cgi注意:为什么这个步骤是必须的?是因为不操作,会导致后期虽然修改了php.ini的值,但是仍然不起作用!

第五步:在ispconfig3中设置
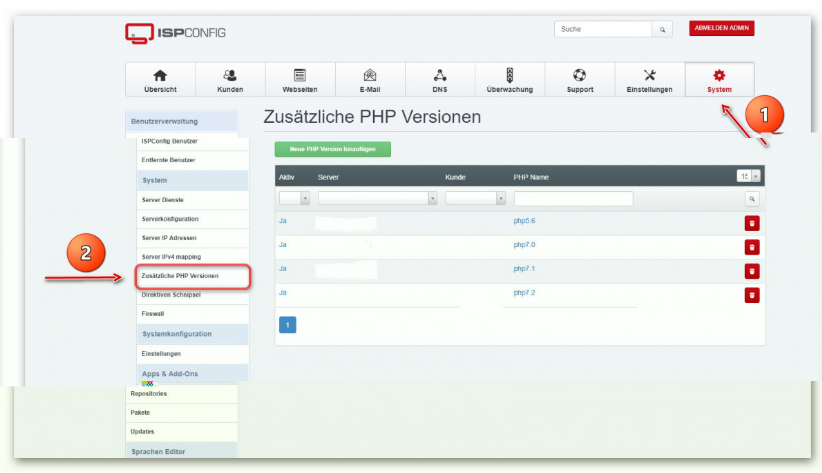
进入ISPconfig控制面板, 我们在其中添加以下内容:“添加新的PHP版本”:

PHP Name:(自己命名,建议以php版本命名,例如:php5.6)

PHP 5.6
标签“ FastCGI Setting”
PHP FastCGI Binary的路径: php5.6-cgi
php.ini目录的路径: /etc/php/5.6/cgi/php.ini

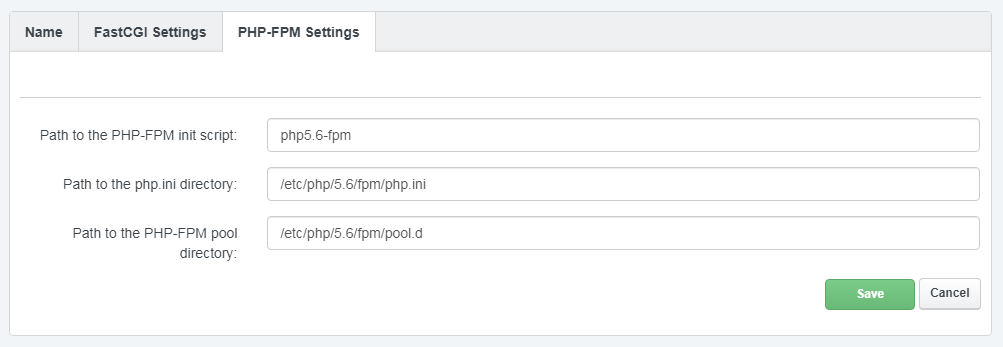
标签“ FPM Setting”
PHP-FPM初始化脚本的路径: php5.6-fpm
php.ini目录的路径: /etc/php/5.6/fpm/php.ini
PHP-FPM池目录的路径: /etc/php/5.6/fpm/pool.d

PHP 7.0
Tab “Name”Server: Select the server hereName: Give a name here
Tab “FastCGI Settings”
Path to PHP FastCGI Binary: php7.0-cgi
Path to the php.ini directory: /etc/php/7.0/cgi/php.ini
Tab “FPM Settings”
Path to PHP-FPM init Script: php7.0-fpm
Path of the php.ini directory: /etc/php/7.0/fpm/php.ini
Path to PHP-FPM Pool Directory: /etc/php/7.0/fpm/pool.d
PHP 7.1
Tab “Name”Server: Select the server hereName: Give a name here
Tab “FastCGI Settings”
Path to PHP FastCGI Binary: php7.1-cgi
Path to the php.ini directory: /etc/php/7.1/cgi/php.ini
Tab “FPM Settings”
Path to PHP-FPM init Script: php7.1-fpm
Path of the php.ini directory: /etc/php/7.1/fpm/php.ini
Path to PHP-FPM Pool Directory: /etc/php/7.1/fpm/pool.d
PHP 7.2
Tab “Name”Server: Select the server hereName: Give a name here
Tab “FastCGI Settings”
Path to PHP FastCGI Binary: php7.2-cgi
Path to the php.ini directory: /etc/php/7.2/cgi/php.ini
Tab “FPM Settings”
Path to PHP-FPM init Script: php7.2-fpm
Path of the php.ini directory: /etc/php/7.2/fpm/php.ini
Path to PHP-FPM Pool Directory: /etc/php/7.2/fpm/pool.d
PHP 7.3
Tab “Name”Server: Select the server hereName: Give a name hereTab “FastCGI Settings”
Path to PHP FastCGI Binary: php7.3-cgi
Path to the php.ini directory: /etc/php/7.3/cgi/php.ini
Tab “FPM Settings”
Path to PHP-FPM init script: php7.3-fpm
Path of the php.ini directory: /etc/php/7.3/fpm/php.ini
Path to PHP-FPM Pool Directory: /etc/php/7.3/fpm/pool.d
第六步:重启
*后一步,重启下面服务:
systemctl restart php5.6-fpm
systemctl restart php7.0-fpm
systemctl restart php7.1-fpm
systemctl restart php7.2-fpm
systemctl restart php7.3-fpm
systemctl restart apache2
原文参考: https://www.goover.de/article/8-installing-several-php-versions-with-ispconfig3-and-ubuntu-18-04/

